Install 3-layer parquet flooring
Install it yourself or would you rather hire a specialist company? No matter what you decide: install it yourself or would you rather hire a specialist company? The high-quality workmanship and the diverse installation options ensure that the installation of a 3-layer parquet or parquet floor is successful.
Floating
Floating installation with click connection

1. Insulation

2. Start
Start laying in the left corner of the room with the tongue side facing the wall. The exact wall distance is set after laying the first three rows.

3. Snap

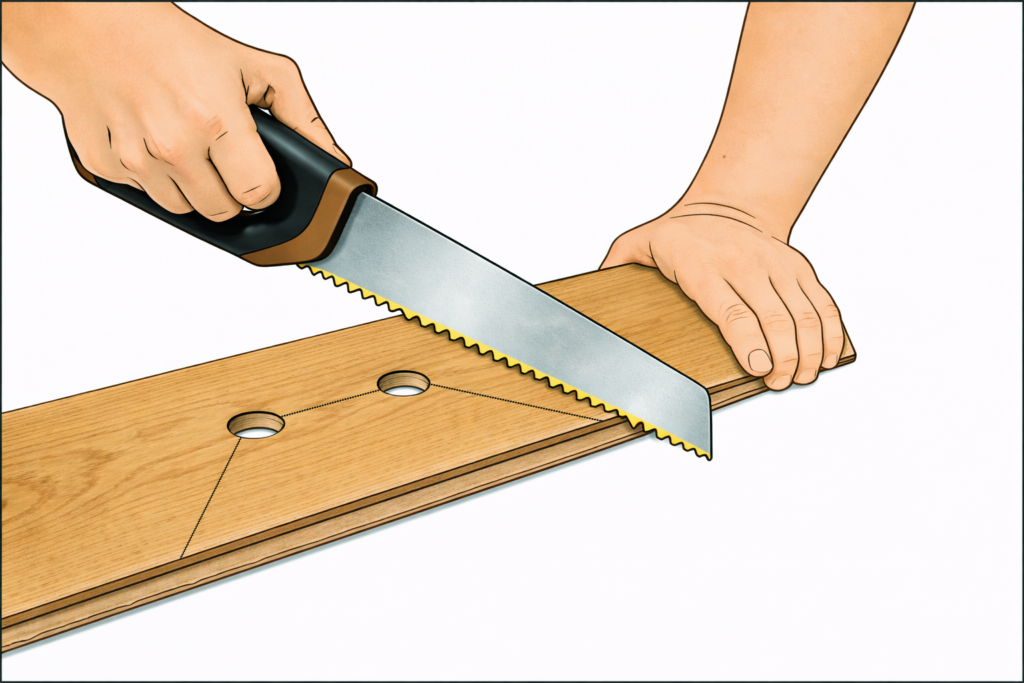
4. Cropping

5. Angle in

6. Align

7. Customize
8. Recess

9. Conclusion

10. Alternative

11. Dismantling
Practical instructions
Would you like to find out more about laying FEEL WOOD solid wood floorboards with clamps?
Glued
Full-surface bonding
We recommend having the full-surface bonding of parquet carried out by a specialist company. If you are installing the floor yourself, it is important to follow the instructions for preparing the installation and the following installation tips.
Depending on the nature of the subfloor, pre-treatments such as priming or filling may be required in accordance with the manufacturer's instructions. The screed must have sufficient strength. Only adhesives that are expressly approved for full-surface bonding of finished parquet may be used. Low-emission adhesives with an eco-label type I or EMICODE EC1 or equivalent classification are recommended. The processing guidelines of the respective adhesive manufacturer must be strictly adhered to.

1. Align

2. Apply
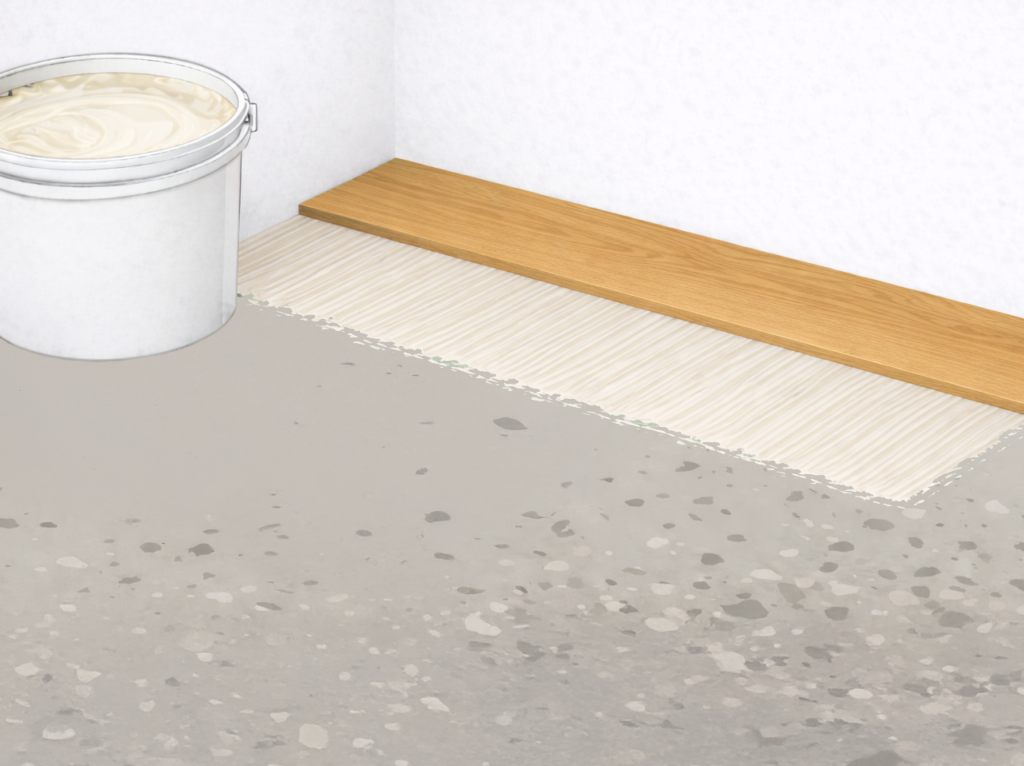
3. Insert
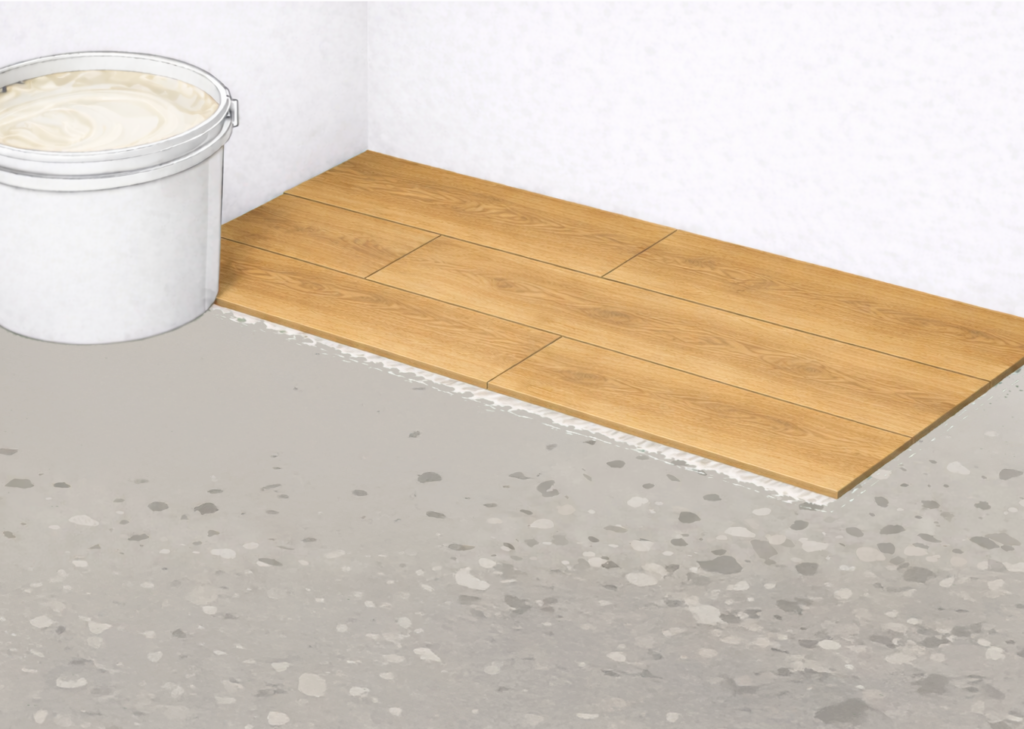

4. Curing


5. Spare
Practical instructions
Would you like to find out more about laying FEEL WOOD solid wood floorboards with clamps?
Floating installation with click connection
1. Insulation
2. Start
Start laying in the left corner of the room with the tongue side facing the wall. The exact wall distance is set after laying the first three rows.
3. Snap
4. Cropping
5. Angle in
6. Align
7. Customize
8. Recess
9. Conclusion
10. Alternative
11. Dismantling
Practical instructions
Would you like to find out more about laying FEEL WOOD solid wood floorboards with clamps?
Full-surface bonding
We recommend having the full-surface bonding of parquet carried out by a specialist company. If you are installing the floor yourself, it is important to follow the instructions for preparing the installation and the following installation tips.
Depending on the nature of the subfloor, pre-treatments such as priming or filling may be required in accordance with the manufacturer's instructions. The screed must have sufficient strength. Only adhesives that are expressly approved for full-surface bonding of finished parquet may be used. Low-emission adhesives with an eco-label type I or EMICODE EC1 or equivalent classification are recommended. The processing guidelines of the respective adhesive manufacturer must be strictly adhered to.
1. Align
2. Apply
3. Insert
4. Curing
5. Spare
Practical instructions
Would you like to find out more about laying FEEL WOOD solid wood floorboards with clamps?
FEEL the WOOD
In our fascinating blog about solid wood flooring we offer a wealth of advice on installation and care, as well as lifestyle ideas and reference projects that we are really proud of.
When you visit him you will quickly understand why.


